Document Portal Security
Security roles
Prior to rolling out the Documents Portal, Roles should be created. Configuration is done on the RPO > System > Security > Documents Portal Roles tab.
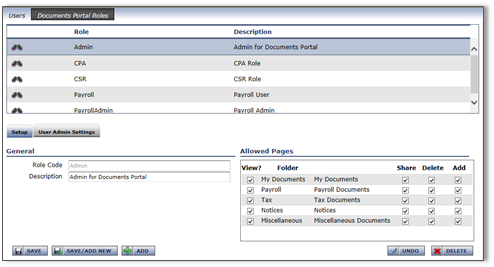
1. Create Document Portal roles
Create Document Portal roles for each system-level User Type that should have access to the Portal. Company Users must be set up individually to ensure they have the right access. ReadyPay has a default list of a few types:
- Admin
- CSR
- Tax Dept
- Controller
- Conversions
- Data Entry
- MIS
- Operator
- Packout
- Company — user must be set up in each company they have access to
- Company Admin — user must be set up in each company they have access to
- Documents — does not require a rule
2. Configure available pages and access rights
Configure the available Documents Portal pages / access rights for each tab. The following are the options for controlling user access:
- View — controls whether the page is visible to the user. If a user has rights to a page, they have rights to view the documents on that page.
- Share — controls whether the user can share a document with another user. Company-level documents cannot be shared. Share applies only to user-uploaded documents.
- Delete — controls whether a user has rights to delete a file from the server (user or company).
- Add — controls whether the user can upload a file. Users with Add rights are able to modify document attributes.
Moving documents
If a user has rights to Add and Delete to/from various pages, they can move a document from one page to another.
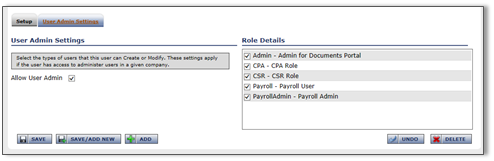
Allowing roles to administer portal access
To assign Documents Portal access, your role must be configured.
- Allow User Admin — must be enabled.
- Role Details — select the roles which the role in question can assign / manage.
When you are viewing a user, if you do not have rights to administer a specific Documents Portal role, you will not be able to edit or delete that access right.
User setup
Adding access to existing RPO users
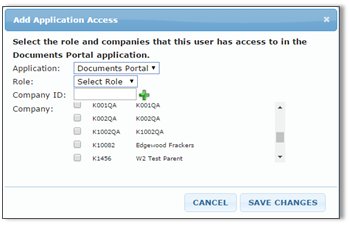
To grant access to an existing RPO user for the Documents Portal, go to the Company Users or System Users page depending on your rights. Select the applicable user in the listing and go to the Documents Portal Access sub-tab.
Click the green + to bring up the Add Application Access dialog. Select which Portal Role they should have — this controls which Document Portal tabs they will see, based on the Role setup. Select each company they should be able to access. This allows them to switch contextual view of the folder (to show company1, then company2, etc.) and also to receive notifications when new payrolls are processed and documents are uploaded.
Creating a Documents Portal-only user
ReadyPay Desktop — create user role
Create a non-RPO role for Documents Portal users. For the sake of instruction, we will call it Documents. Check the Company Sets, Default, and System areas off, so that when collapsed your role looks like this:
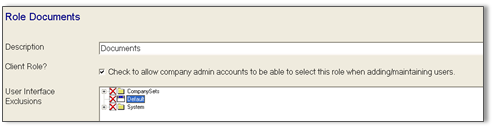
You should also check the Client Role? option so the role can be used by Company Admins to set up their own users.
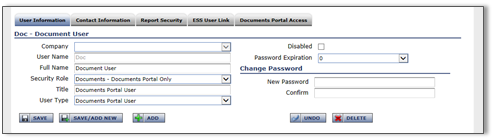
Add the user
Create the user in RPO. In the Company field, select a company if they are a single-company user; otherwise, leave it blank (multi-company users). Assign the user the Documents Security Role and grant them a User Type of Documents.
If they are a single-company user, select a company. If they are a multi-company user, leave that field blank. As always, set the Password Expiration and create a password for the user. SAVE the user.
Add their rights to the Documents Portal Access sub-tab.
When the user logs into ReadyPay Online, the Documents Portal opens as their home page and only the selected companies are available.
Questions?
Contact your Payroll Service Provider.