Report Writer Overview — Basic Report Writer
Basic Report Writer functions very differently than Advanced Report Writer. While this option can be used for very basic reports, it provides a number of options that allow for more complex reporting requirements not supported in Advanced Report Writer.
Getting Started
You begin by clicking the Add Report Writer Report button.
You are presented with an Add New Report Writer Report dialogue box.
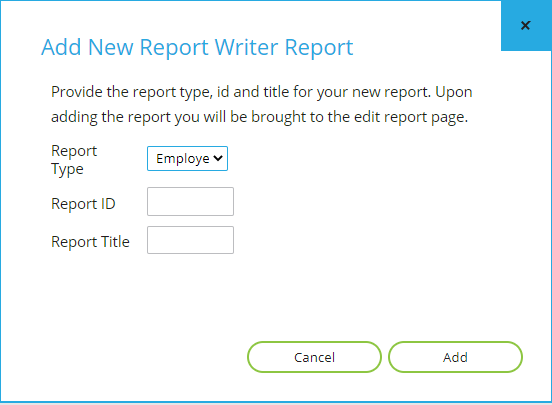
Basic Report Writer contains a number of Report Types that are tailored to accessing data from a number of sections of the system. While there are options to report on company level data, the vast majority of reports built in this section use the employee specific report types. Click on the Report Type drop list to display the available report types.

The most commonly used Report Type is Employee List. It provides access to employee and payroll history data.
Other employee report types provide access to employee data, payroll history data AND the data noted in the title (e.g., direct deposit setup, deduction setup, etc.).
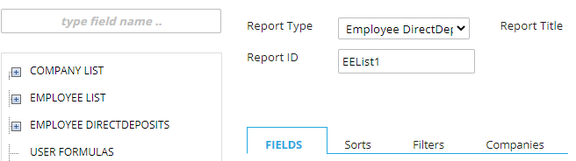
After selecting the Report Type, assign a Report ID and Report Title. These are free-form fields. Next, click the Add button.
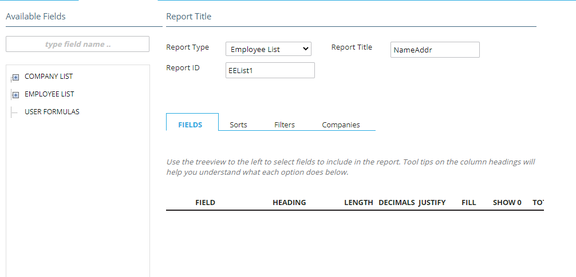
This brings you to the Basic Report Writer setup screen.
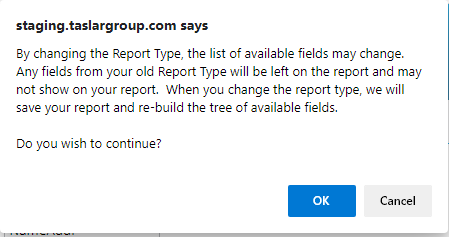
If you need to change your report type, select it from the Report Type drop list. The following message will be displayed. Click OK to commit the change. A new data collection will be displayed under Available Fields.
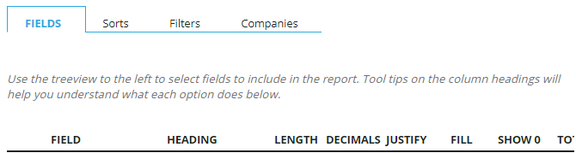
The Basic Report Writer Setup has four sections: Fields, Sorts, Filters and Companies.
Build your report starting with the Fields Section. Moving to the right, add any needed sorts, then filters.
Companies is only used if the user has access to multiple company codes.
Fields Section
The Fields Section is where you add the fields you want included in your Report Writer.
There are two ways to select data for your report. One is the Search. The other is through the Data Collections. Data Collections are displayed below the "type field name" search box and contain data organized by category.

Order of Display
If you need to rearrange the order in which fields are displayed in the grid, use the field to the left of the delete option (X).
![]()
Left-mouse-click on this symbol to highlight the field, then move up or down accordingly.
This function is available on the Sorts and Filters Sections as well.
Using Search
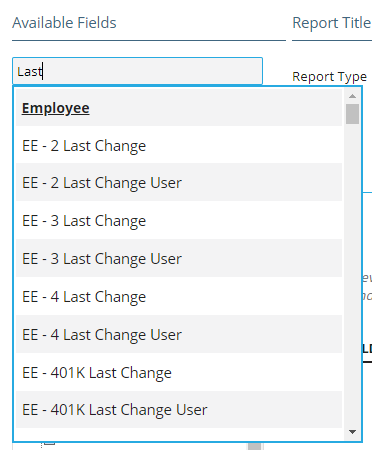
On the left side of the screen, there is a column heading titled Available Fields. Below it is a field search option called "type field name". As you type in a field name, a list of fields matching your entry will be displayed. For example, if you enter "Last", a large list of field names containing "Last" is displayed. A scroll bar is available at the right if needed. From the list, select the field you want added to the report.
The list will shrink as your search criteria is expanded. For example, "Last Name" is more specific than "Last".
Using Data Collections
A Data Collection is a series of fields presented in Report Writer based on the tables in the database.
Below the Search option, you will see a list of Data Collections available to the Report Type you have selected.
- Every Report Type has access to the Company List collection.
- Every Employee type report has access to the Employee List collection.
Other collections are made available to the report and some are removed as you change the Report Type.
Note in the example: the Report Type is Employee Direct Deposits. The Employee DirectDeposits collection is included.
If you change the Report Type to Employee Deductions, the Employee DirectDeposits collection is removed and the Employee Deductions collection is added.
Exercise caution when changing report types. If there are fields in the report from the collection that was removed by changing the report type, those fields remain in the report. If not removed, the report will fail when you attempt to run it.
Click the + (plus) sign next to the Collection name to display the fields found in that collection.
The Employee List collection contains a significant number of fields and is organized in logical sub-collections.
Use the plus sign next to each sub-collection to display the available fields.
Adding Fields to the Report

Add a field to your report by clicking on the field name.

When the field is added, it is marked in BOLD in the field list of the collection. This indicates the field is in use by the report. Additionally, a number of formatting options will be populated with the defaults for the field you selected.
Use the slide bar at the bottom of the screen to see additional formatting options you can apply to the field.
Following is an explanation of the formatting fields and the options available to you:
-
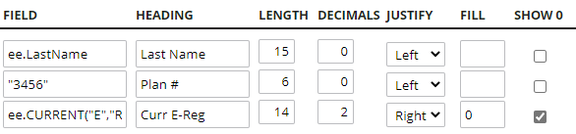
Field: Contains either the field name selected from the collection or a "user defined" field name. Create a user defined field by entering the value you want to be displayed in that column surrounded by double quotes. You will need to provide Header, Length and Justify values. See sample below for Field "3456".
-
Heading: Heading for that column on the report. Headings can be changed as needed. Simply type over the existing header to change it.
-
Length: Number of columns allocated for the Header and the field data.
Many of the default values for Heading and Length are large and can be adjusted to save space on the report.
-
Decimals: Automatically assigned for numeric fields. Can be increased or decreased as needed.
-
Justify: Orientation of the data in its column in the report. Numeric fields default to Right Justified. All others to Left. Can be changed as needed.
-
Fill: The character used to fill the field based on its length. Most commonly used is zero for fields to be zero-filled.
If the Length value is 14 and the data is 6 positions, the field will be zero-filled with 4 zeroes.
See sample below for Field Curr E-Reg.
-
Show 0: If a numeric field has a value of zero, this will force the system to display a 0 (zero). Otherwise the field is blank.
Results:

-
Total: Creates a report-level total for the field.
-
No Punctuation: Removes dashes from Social Security numbers, slashes from date fields, etc.
-
No Periods: Removes decimals from numeric fields and periods from data fields.
-
Overpunch: If a numeric field is a negative value, a dash is placed over the last digit to the right in the field. Originates with key punch card systems and is VERY rarely used — most likely obsolete.
-
UpperCase: Forces text fields to all UPPER CASE (e.g., Smith is displayed as SMITH).
-
Multiplier: Allows you to perform multiplication on numeric fields. Values can be negative, positive and decimals.
-
Row Total: Click this box on all fields you want to include in a Row Total. The system automatically adds up those fields and creates a field called Row Total.
Sorts Section

Use the Sorts Section to define the display order for the data in your report.
Select the fields that will be the basis of your sort from the Data Collections found in your report.
Fields included in the Sort will be marked in BOLD in the field list of the collection.

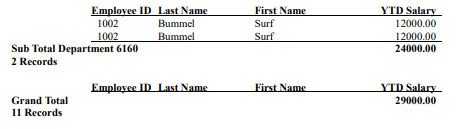
If you want a total displayed after each sort change, click the Sub Total check box.
In the sample there is a Grand Total as well as a Sub Total. Grand Totals are produced by checking the Total field on the item needing a Grand Total.
Add additional sorts as needed to display the data in the proper order.
The item listed at the top is the primary sort. Subsequent entries are sub-sorts of the entry directly above it.
![]()
Change the sort by moving fields up or down in the list.
Unlike Advanced Report Writer, you can sort on fields not included in the report.
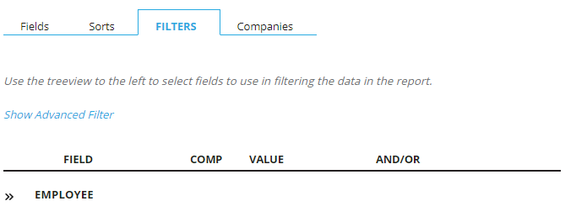
Filters Section
Use the Filters Section to limit which employees are included in your report.
Filters can be based on employee data and the numeric values found in employee payroll history.
There are four components to a Filter expression:
- Field: The field your filter is based upon.
- Comp: The Comparison Method. Options are:
=Equal to<Less than>Greater than<=Less than or equal to>=Greater than or equal to<>Not equal to
- Value: The data your filter will use as a basis.
- AndOr: Used to link your filters together. Options are And or Or.
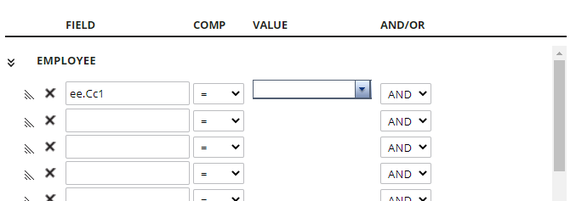
Once you add a Filter Statement to the report, the Collection Name that your filter belongs to is displayed.

Use the >> option to open the Filter Section. You are now able to add additional steps to your filter.
Examples of commonly used filters:
ee.empstatus = "A"— include active employees onlyee.Cc1 = "100"— include employees from Department 100ee.CURRENT("E","Reg").Amount <> 0— include employees whose current pay period has an E-Reg amount not equal to zero
Examples of linked filters:
EE.empstatus = "A" AND ee.Cc1 = "100"— include employees who are Active AND whose home department (cc1) is 100ee.Cc1 = "100" OR ee.Cc1 = "30"— include employees from Department 100 OR Department 30
Companies

If a user has access to more than one company code, those codes are listed under the Companies section.
Using the check box next to the company code, select the companies you want included in the Report Writer.

The system automatically checks the box for the company code you have selected in ReadyPay Online.
When including multiple company codes in a report, add the company code as a field in the report. This facilitates reviewing the data that is included.
Fields used in the report are based on the setup of the company you are logged into in ReadyPay Online. Some of the fields used in the report may not exist or are named differently in the additional company(s) added to the report. This applies to fields based on the Taxes, Earnings, Deductions, Insurance and Accruals setups of the company.
Additional Options
Several fields are displayed at the bottom of the Report Writer Setup screen.
![]()
- Reports List: Returns user to the initial Report Writer tab. All Basic Report Writer setups are displayed here.
- Save Report: Saves the report setup as it exists. Save your reports often to ensure no loss of data due to system failure.
- New Field: Currently unavailable.
- Cancel: Will undo any changes you've made since the last time you saved the report.
- Delete Report: Self-explanatory.
- Preview Report: Use to see a preview of the report. Helpful when testing layout, filtering and sorting.
All previewed reports can be found under Reporting > My Completed Reports.

Questions?
Contact your Payroll Service Provider.