Employee: Payroll Data | Auto Pays
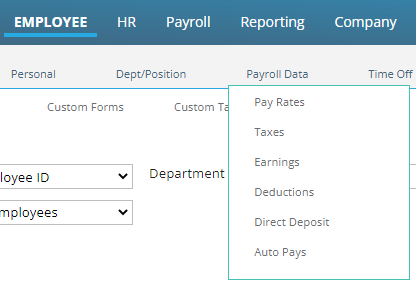
Auto Pays are found in the Payroll Date section under Employee.
Some employees can have payroll that requires a significant amount of data entry. This is very common in Job Costing or Piece Work scenarios. In these cases, Employee Auto Pays can be used to customize the payroll entry grid, thereby reducing the amount of entry time.
Employee Auto Posts are similar to Company Auto Posts in their purpose but provide more features and flexibility than company level Auto Posts. Employee Auto Pays can be turned off during individual payrolls if not needed. Company Auto Posts are always present.
For information about Company Auto Posts, click here.
Employee Auto Pays are displayed in the Payroll Entry Grid below any Company Auto Pays entries (if present).
If the company uses a Time Import, the employee Auto Pays entries are displayed above the imported payroll entries.
Working with Employee Auto Pays

When accessing this tab, any active Auto Pays are displayed in the upper section of the tab.
Use the "Show all auto pays" check box to include inactive Auto Pays in the display.
Adding new Auto Pays entries

To add a new Auto Pays entry, click the Add Button at the bottom left of the screen. In the lower section of the tab, the Code field in the Rates section becomes active.
Rates Section

The Code field is a Drop List containing all active deduction, earnings and tax codes setup on the company .
Select the appropriate code to use with the new Auto Pays entry.
Hours: Leave at 0.00 or enter the number of hours to be posted on this Auto Pay line in the Payroll Entry Grid.
Amount: Leave at 0.00 or enter the dollar amount to be posted on this Auto Pay line in the Payroll Entry Grid.
Rate: Leave at 0.00 or enter the rate to be used on this Auto Pay line in the Payroll Entry Grid.
Dates Section

Start Date: The current Check Date from Payroll is entered automatically. Update as needed.
End Date: The End Date is populated with 12/31/2100 by default. Update as needed.
Rate Code: Leave blank or select a Rate Code from the provided Drop List.
Organization Section
The available fields in this section reflect the Cost Center setup of the company found in the Departments tab in Company Setup. There can be from one to five available fields in this section. Our sample company has one Cost Center level called Department.

On another company, there are three fields as per the Cost Center setup on the Departments Tab.

Each field contains a Drop List reflective of the data in those Cost Centers in the Departments Tab.
Each field can be blank or populated using the provided Drop List(s).
Note: Unless overridden the rate used will be the employee's Base Rate in effect for the check date.
Unless overridden, the system will use the employee's home Cost Center settings.
Job Code: Leave blank or select the appropriate Job Code from the provided Drop List. The Job Code Drop List is populated by the entries found on the Jobs Tab in Company Setup.
Pay Type: Leave blank to have this Auto Pay entry present on ALL paycheck types.
Use the provided Drop List to have the Auto Pay only applied to the selected Paycheck Attribute.
The Drop List for this field is populated using the entries on the Paycheck Attributes Tab in Company Setup.
Note: When using the Rate Code, Job Code and Cost Center overrides on Employee Auto Pays, you will need to adjust the Payroll Entry Grid settings so these fields are displayed. In Payroll Entry, Right mouse click on the column heading of the grid.

The "Pay Entry Field Selection" Option is displayed. Click it to see a list of fields you can display on the grid. Fields with Check Marks are already displayed.

Click the fields you need to add to the Grid. Use the Up/Down arrows to the right to arrange their order of display.
The Up Arrow moves the field left. Down moves right.
![]()
Saving the new Auto Pays entry
Use the Save Button at the bottom left of the screen.

If you need to enter additional Auto Pays entries, you can use the Save/Add New button.

This will save the entry and move the cursor to the Code Field in the Rates Section.
The following message will be displayed if you navigate away from the tab without saving the record.

Cancel Button

Use the Cancel Button to remove an Auto Pays record you are working on and wish to delete. Clicking this button will erase any data you've entered in the record.
Delete Button
![]()

Use the Delete Button to remove an existing Auto Pays record. Select the record to delete in the top section of the tab and click Delete. The following question will be displayed. Click OK.
Note: To retain an Auto Pays record but remove it from the display, update the End Date of the record with a date prior to the current check date in Payroll. The record will not be displayed unless the "Show all auto pays" check box is selected.
Common Uses
- An employee works multiple jobs during the payroll period. The employer needs to know the expenses for each Job Codes. In our example, there are three jobs worked. Each job has a different pay rate.
Our Auto Pays entries look like this:
![]()
In Payroll Entry, the display is as follows:

- Employee receives an add to Net Draw deduction in the amount of $250.00 on an inconsistent schedule. Since this does not happen on a consistent schedule (every payroll, first payroll of the month, etc) setting it up on the employee as a scheduled deduction on the employee is problematic. Adding it as an Auto Pay allows the user to see the entry in Payroll and allow it or delete it as appropriate.
The entry on the Auto Pays tab is as follows:
![]()
In Payroll Entry, the display is as follows:
![]()
Using the Employee Memo Pop Up Box from the Miscellaneous Tab in Employee Maintenance is helpful in these cases.

Turning Employee Auto Pays on or off globally
By turning Employee Auto Pays on or off we are discussing should they, or should they not, be posted in Payroll Entry during the Start Payroll process. Typically. Auto Pays are active on the regular payrolls of the company.
On second and/or adjustment type payroll, the Employee Auto Pays may not be needed or desired.
The setting that determines if employee Auto Pays are active or not is found in multiple places.
- Start Payroll: On the Start Payroll Box, there is an Edit Function (Pencil Icon) for each Batch in the Payroll.

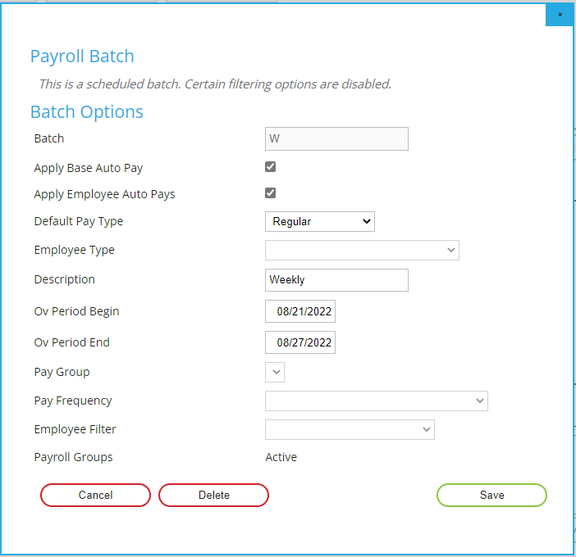
Click the Pencil Icon for the batch you wish to review. The Batch Options Box will be displayed. If the "Apply Employee Auto Pays" Check Box is checked, the Employee Auto Pays will be included in the batch. Uncheck the box to exclude the Employee Auto Pays from the batch.
Note: The "Apply Base Auto Pay" Check Box does not apply to the Employee Auto Pay entries.
This references the value of the "Base Auto Pay" field found in the Pay Rates Tab under Payroll Data in Employee Maintenance.
