MineralHR Integration Setup
First, you will need to contact MineralHR to get a service bureau account created. Once this is complete, your account manager will provide you with the SSO credentials needed for service bureau setup.
You must give your RPO domain name (e.g., yourRPOsite.com) to your
MineralHR account manager. Only those domain names whitelisted by
MineralHR are allowed to connect to their SSO service.
Step 1: Configure your ReadyPay Online site for the integration
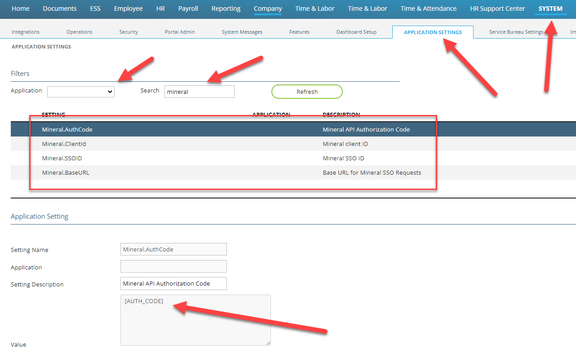
Once you have gathered that information, you need to update the values for 4 settings in the RPO AppSettings table. You can review these fields in the UI but you cannot update them in the UI; these can only be updated via SQL directly on your RPO database. This is a one-time setup.
-
Mineral.BaseURL:
https://restapis.trustmineral.com/v2/(this must always include the trailing slash)(The URL above is a truncated version of the URL that MineralHR may provide you. Our code appends to this.)
-
Mineral.ClientId: (assigned to you by MineralHR)
-
Mineral.AuthCode: (assigned to you by MineralHR)
-
Mineral.SSOID: (assigned to you by MineralHR)
The SSOID provided by MineralHR is case sensitive. Make sure to copy and paste correctly whatever you receive from them.
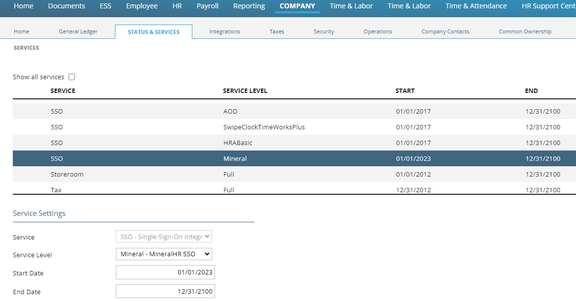
Step 2: Configure your end client companies
Add the SSO service to the company with a service level of Mineral.
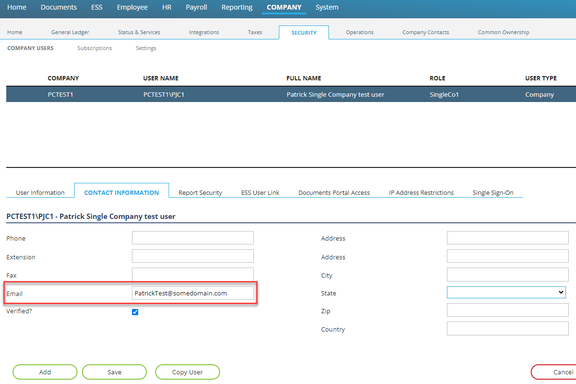
Second, review the email address for each RPO user account who will use MineralHR.
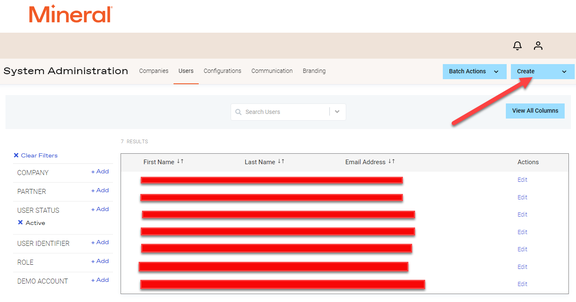
Step 3: Add user accounts in the Mineral portal
You (or the end client) must create a user in the MineralHR portal for each person who will use the SSO integration.
You must make sure that the username in MineralHR is actually the
email address that their ReadyPay Online user account uses. You cannot
use random user names in MineralHR and assume that because the email
address at MineralHR matches that it should work. We map
SUsers.emailAddress to the MineralHR user name field (not the
MineralHR email address field, so they both have to match).
Step 4: Use the SSO integration
Once steps 1–3 are complete, the next time each user logs in, they will see Mineral in the ribbon at the top of the page.
![]()
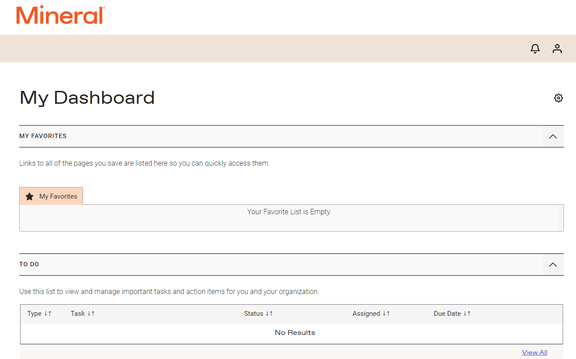
When each user clicks on the Mineral link in the menu, they will be brought to their MineralHR dashboard in a new browser window.
Questions?
Contact your Payroll Service Provider.