Attendance on Demand (AOD) Integration Setup
Single Sign On (SSO) — Database Setup
ReadyPay Online (RPO) supports single sign-on into AOD. Before SSO
capabilities can be used, AOD needs to be configured. Provider (AOD)
configuration information is stored inside the dbo.SIntegrationProvider
table. This table contains external system settings that apply to all
companies that utilize SSO capabilities from within RPO.
To enable the SSO provider into AOD, the following record has to be
created in the dbo.SIntegrationProvider table.
| Field Name | Value | Description |
|---|---|---|
| Provider | AOD | |
| IntegrationType | SSO | |
| Description | Provide Single Sign-On functionality with AOD Timeclock | |
| MultipleConfigs | False | |
| ProviderSpec1 | <Vendor Token> | Vendor token provided by AOD (sample value: "PayrollCoName") |
| ProviderSpec2 | <Pre-auth Action> | Pre-authentication value of the TAeAuthenticationPackage object. This value is provided by AOD (sample value: "90210") |
| ProviderSpec3 | This configuration option is not used | |
| ProviderSpec4 | This configuration option is not used |
Single Sign On (SSO) — Company Setup
Adding SSO Service
In Company | Master Company Setup | Status & Services on RPO, add the SSO Service and set the Service Level to AOD SSO.
Adding SSO Integration
In Company | Master Company Setup | Integrations on RPO, click ADD and select the SSO Integration Type and AOD as the Provider from the pull-down menus on the right-hand side of the screen. The Configuration will remain Default. Click SAVE.
In the Options sub-tab, enter the following:
| Field Name | Value |
|---|---|
| Username | Enter the service bureau's web services username as provided by AOD. For example: aodinterface1234 |
| Password | Enter the service bureau's web services password as provided by AOD. For example: ai$90210 |
| AOD URL | Enter the web address for the XML Bridge including the client DB. Replace the underlined portion of: https://[yourURI].attendanceondemand.com:8192/cc1exec.aew/soap/IAeXMLBridge |
| Use ID For Badge | Should always default to checked (True). If it is not, make sure it is checked. |
| Trim ID | Set this to the same named setting on the Timeclock Integration. |
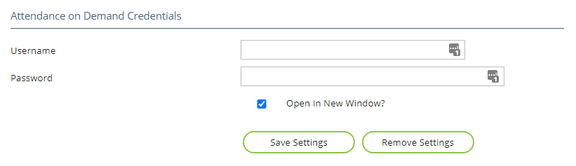
Once the Service and Integration are set up, users may click on the Time & Labor icon in the blue menu bar on RPO and will be taken to their Account Settings page. Users should add their AOD login in the Attendance on Demand Credentials area. Then click the SAVE SETTING button. A confirmation will be displayed at the top of the screen if successful.
Timeclock — Company Setup
Adding Timeclock Service
In Company | Master Company Setup | Status & Services on RPO, add the Timeclock Service and set the Service Level to AOD - Infotronics Integration.
Adding Timeclock Integration
In Company | Master Company Setup | Integrations on RPO, click ADD and enter a brief description (perhaps client ID) in the Name field. Then, select the Timeclock Integration Type and AOD as the Provider from the pull-down menus on the right-hand side of the screen. Click SAVE.
In the Options sub-tab, enter the following:
| Field Name | Value |
|---|---|
| Username | Enter the service bureau's web services username as provided by AOD. For example: aodinterface1234 |
| Password | Enter the service bureau's web services password as provided by AOD. For example: ai$90210 |
| AOD URL | Enter the web address for the XML Bridge including the client DB. Replace the underlined portion of: https://[yourURI].attendanceondemand.com:8192/cc1exec.aew/soap/IAeXMLBridge |
All other Options are optional and depend on the client's Calendar and setup in AOD.
Adding Timeclock Integration Schedules
In Company | Master Company Setup | Integrations on RPO, find the Integration Schedules page. Click ADD and enter the following:
| Field Name | Description |
|---|---|
| Integration Type | Choose Timeclock. |
| Provider | Choose AOD. |
| Config | Choose the Name of the Timeclock Integration Setup that was created for the company. |
| Action | Choose UpdateChangedEmployees to sync changes. |
| Run Every (secs) | Enter the number of seconds between syncing of employee changes. (It is recommended to perform this action every hour — 3600 secs.) |
| Start Date | Choose a date and time in the future to begin the Integration action. |
Click SAVE when done. The schedule should run within just a few seconds as there is no Last Run or Last Action Date. You can click the RUN ACTION NOW button to force the action to occur as a test. This will update the Last Run field and the Integration Schedule will be based off that time (and the Run Every (secs) field). The Last Action Date will populate when there are changes made due to the Integration Schedule (changes to EE data).
Fields Sent to AOD
The following fields are pushed from ReadyPay Online to AOD:
- Employee ID
- First Name
- Last Name
- Initial
- SSN
- Address
- Address Line 2
- City
- State
- Zip
- Active Status
- Home Phone
- Work Phone
- Clock (Badge)
- AOD PIN (specified in integration setup)
- Union Code
- Hours
- Birth Date
- Hire Date
- Rehire Date
- Emergency Contact
- Employee Status
- Employee Type (hourly status)
- CCs (WorkGroups)
- Current Rate, type, and effective date
Any employee field in RPO that contains a value, which has been sent to AOD, and is then subsequently deleted in RPO will not update the corresponding field to be blank in AOD. You must update the employee field in AOD manually.
Questions?
Contact your Payroll Service Provider.