Supervisors Setup and Uses
Overview
The Supervisor functionality discussed in this article is presented using ReadyPay Online (RPO). While some of the setup relating to Supervisors can be done in ReadyPay Desktop (RPD), there are some aspects of the setup that can only be done in RPO.
Older versions of RPD and RPO contained different mechanisms for managing Supervisor information. Those mechanisms are still available in the current versions of RPD/RPO. They do not, however, provide access to the newer Management functions available when using the Supervisor setup methods discussed in this article.
Setup
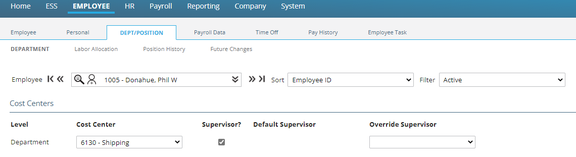
Go to Employee > Dept/Position Tab. Identify the appropriate employee(s) as supervisor by checking the box called Supervisor? This adds them to the list of Supervisors (discussed later in the article). Repeat as necessary so all supervisors are identified appropriately.
Go to Company > Department & Labor tab. Choose the appropriate level. For each entry under the Level, there are two sub tabs, the Setup sub tab and a Supervisors sub tab. In my company, level one is called Department. The sub tabs are called Department Setup and Department Supervisors. The sub tabs use the name of the level from the Dept Setup Tab. If Level 1 is called Dept, the sub tabs would be called Dept Setup and Dept Supervisors.
As the focus of this article is using the Supervisor function, there are a number of fields on the Department Setup Tab that are not discussed.
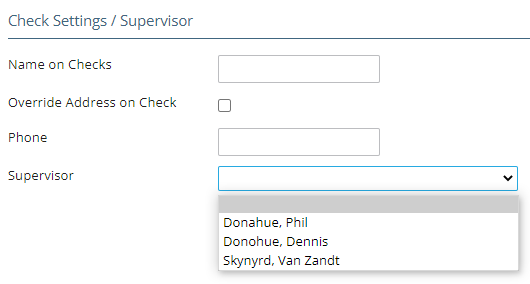


On the Department Setup sub tab, go to the Check Settings / Supervisor section. Click on the Supervisor Field Drop. This will display a list of all employees listed as Supervisors. Assigning a Supervisor on this sub tab is optional. If used, the Default Supervisor field on the Employee Dept/Position field is populated. Go to the HR section > Performance/Reviews tab > Appraisals sub tab. The Default Supervisor field is also populated. Go to the Department Supervisors sub tab. A list of all employees marked as Supervisors will be displayed. The following must be completed to allow the supervisor to see their employees in the Kiosk. Click the Supervisor? check box to assign this person as the Department Supervisor. Click the Notify? check box for the Supervisor to receive notices that they have approvals to address for their employees.
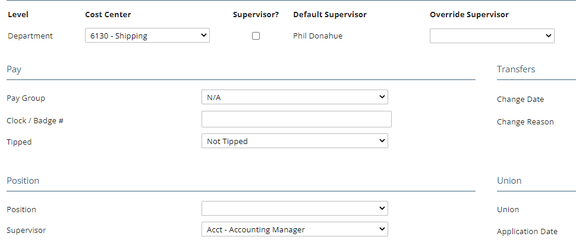
There is an Override Supervisor field on the Employee Tab > Department and Position Tab. In cases where the supervisor for an employee is not the default supervisor, select the appropriate supervisor from the drop list.
Go back to the HR section > Performance/Reviews tab and then the Appraisals sub tab. Note the Default Supervisor field is populated with the Override Supervisor name.
After you add an appraisal entry, you can select an Override Supervisor from the drop list.
Working with Multi-Level Company Structures
If the company structure has more than one level, supervisors should be identified for each.
In our example, the company structure is a Level 1 called Branch and a Level 2 called Dept.
Using the steps noted above, identify the appropriate employees as supervisors, regardless of the level they supervise.
Once completed, go to the Company > Departments & Labor tab.
Go to the Level 1 sub tab. In our example, Level 1 is Branch. Tabs for this level will be called Branch Setup and Branch Supervisors.
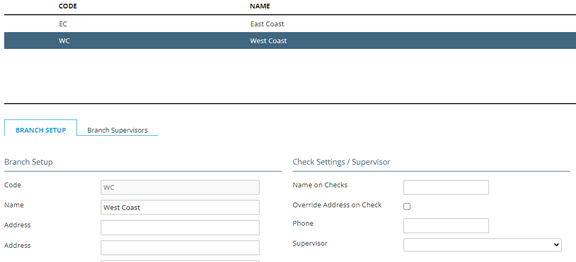
In the Check Settings / Supervisor section, select the Supervisor from the drop list. The drop list will only include individuals who are identified as Supervisors of the Branch level.

Move to the Branch Supervisors sub tab.
Use the Supervisor? check box to identify the appropriate individual as the supervisor of the Branch.
Click the Supervisor? check box to assign the individual as the supervisor of this Branch.
Click the Notify? check box for the supervisor to receive notifications of action items for their employees.

Repeat for all Branches. Move to the Level 2 sub tab to assign supervisors for each Department.
As Level 2 is called Dept, the sub tabs are called Dept Setup and Dept Supervisors.
Repeat the steps above for each entry in Level 2.
Setting up Supervisors on the Kiosk
Following are the steps that allow a Supervisor to see and manage their employees on the Kiosk.
Go to Company. Choose User Administration in the ESS Setup section of the screen.

![]()
If the supervisor does not have an ESS account set up, use the Create Account function to create one. The Security Role for the supervisor must be EmployeeRole - Employee.
If the supervisor already has an ESS User, be sure the Security Role for the supervisor is EmployeeRole - Employee.
Verify the Supervisor Setup
Log in to the Kiosk using the supervisor's credentials.
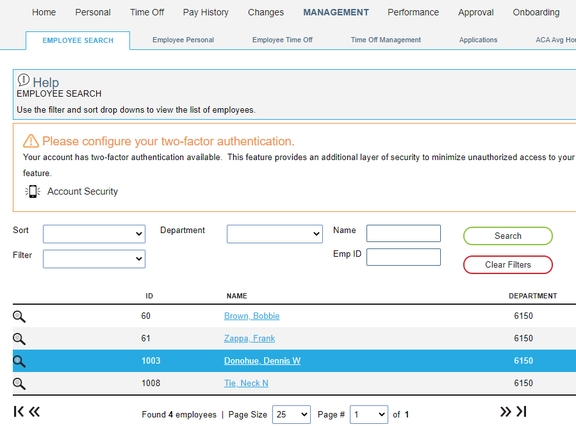
Go to the Management tab.
At the bottom of the screen, the employees associated with the supervisor will be displayed.
![]()
Use the Magnifying Glass option to view the individual employee's data.
The data each Supervisor can access about their employees is controlled by settings in the Kiosk Approval Configuration function. Only a Kiosk Admin User can access and maintain those settings.
Post Setup Clean-Up
If the client being worked on was using the older Supervisor reporting information, the following should be done.
Employee Review
Go to the Employee section and select the Dept/Position tab. You can do this in both RPD and RPO.
In my sample, note there is the Default Supervisor data AND an entry in the Supervisor field in the Position section. We would need to remove the older and incorrect Supervisor data.
Review the Dept/Position tab of ALL employees (active, terms, etc.) in the company. Remove any reference to a supervisor in the Supervisor field in the Position section of the tab.
Once the employee data has been purged, go to the Company Setup > Misc tab in RPD. This tab is not available in RPO.
On the Misc tab, click the drop list and scroll down to and select the Supervisors option. Use the Delete (X) button to remove all of the entries.
If a reference to any of the supervisors still exists anywhere in the company, the delete(s) will fail with an error that advises where the Supervisor is still in use. You must address the error in order to be able to delete the Supervisor entry.
Questions?
Contact your Payroll Service Provider.