FUTA Audit Workflow
The purpose of the FUTA Audit Workflow is to allow Service Bureaus to calculate how much money is due or to be refunded when an employer has a FUTA Rate Change. The workflow then provides steps on how to process the overpayment or amount due.
Important Details Before You Start
-
The FUTA Audit Workflow is designed to be run BEFORE processing year-end tax filings. The FUTA Audit Workflow creates positive or negative liabilities so that the FUTA payments create correctly, and display correctly on the FUTA 940 return. To see the entry created by the FUTA Audit Workflow, view the Payroll Manager > Tax Liability tab at the company level. The Liability Date will be the last day of the quarter you choose, and the PR column will display the number "50".
-
In order to run the FUTA Audit workflow for any given period, the tax codes affecting that period must be active. In other words, the FUTA tax and the state SUI Tax that affect the FUTA tax need to be active as of the first day of the tax year (01/01/xxxx) for the workflow to run. These dates are found in Master Company Setup > Taxes for any given tax code.
-
The Tax Service (Master Company Setup > Services) must be active for the entire quarter which is being processed AND the impound date of any tax monies. For example, you are running the workflow for the quarter ending 12/31/2022 and you will impound the end clients on 1/13/2023. Then the tax service end date needs to be 1/13/2023 or later.
-
The Tax transfer must be active for the date that covers the impound of additional liability.
-
The workflow is run against a Company Set. Make sure ONLY those companies you want processed are included in the company set. For example, do not include companies that are FUTA exempt or have FUTA blocked.
-
Make sure each client you run the workflow on is set to "Live" under Master Company Setup > Status Tab > Status field.
1. Create the Employer FUTA Audit Task
In ReadyPay Desktop, navigate to System > Management > Task Manager tab. Click the yellow star to create a new task. Then select "Employer FUTA Audit" from the Task dropdown list as shown in Fig. 1.

Fig. 1
Complete the following fields:
- Select the Assignee. The Assignee will see the task in their personal task list. The default is the person creating the Employer FUTA Audit task. Note that the task will appear in a user's task list box. See Fig. 3.
- Select the Priority as it fits to your needs.
- Select the due date for this change: Select the due date or allow it to default to the current date.
- For Company: Leave this blank.
- Notes: Make any notes that apply.
Review the information for accuracy, and then click the "OK" button to add the task.
The outstanding task will display on the Task Manager tab (as shown in Fig. 2), where all users can view it.
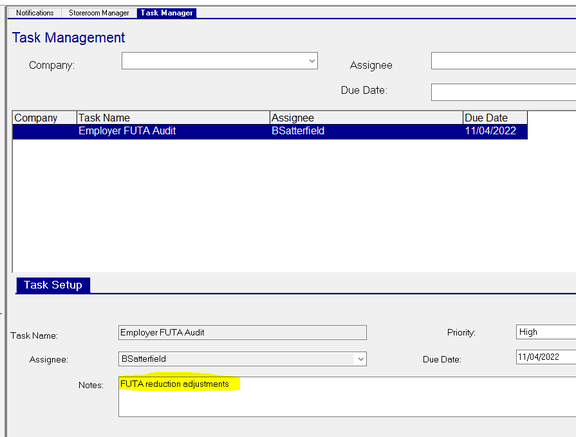
Fig. 2
2. Open the Task
The FUTA Audit Workflow job resides in the Assignee's Tasks area.
If the Assignee doesn't see the Tasks section, have them click on the Tree View and Tasks Icons from the Tool Bar to unhide the section.
![]()
The Tasks area will be visible with the Tree View at the bottom left of the screen.
To execute the Workflow, double click on the entry in the Tasks area.

Fig. 3
3. Review the Instructions
Read the instructions within the dialogue box. It is highly recommended that the user run the task on company sets.
For Consolidated Companies, run on only the parent company.

Fig. 4
After review, click the "Next" button. An Employer FUTA Audit dialogue box displays as shown in Fig. 5.
4. Select the Date Range
Select the date range for the quarter you want, e.g., 10/01/2022 – 12/31/2022.
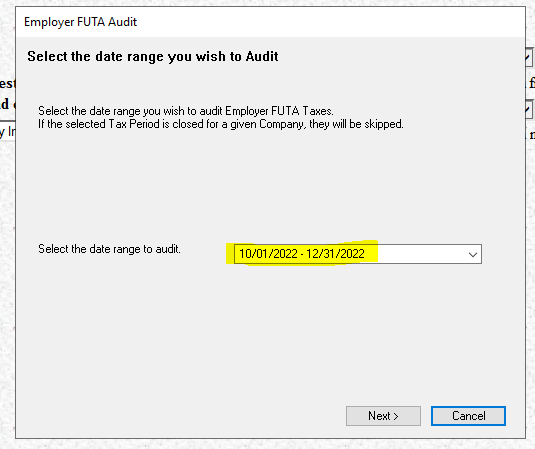
Fig. 5
Click the "Next" button. Select the desired Company Set and click the "Next" button.
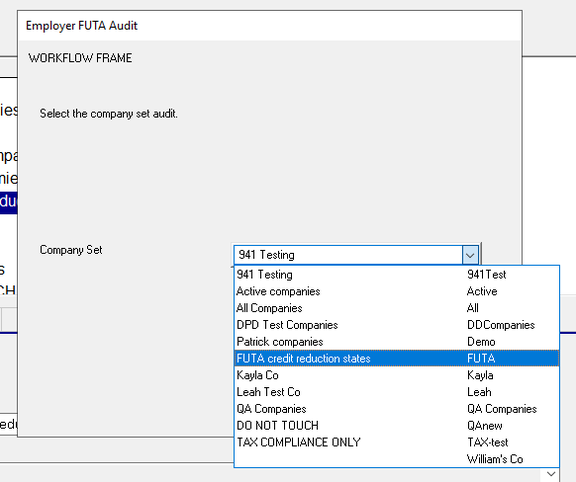
Fig. 6
Click the "Next" button again to calculate variances.

Fig. 7
It may take a few minutes to calculate the variances.
5. Review the Calculated Variances
The next dialog box will show the calculated variances for each company (if any).
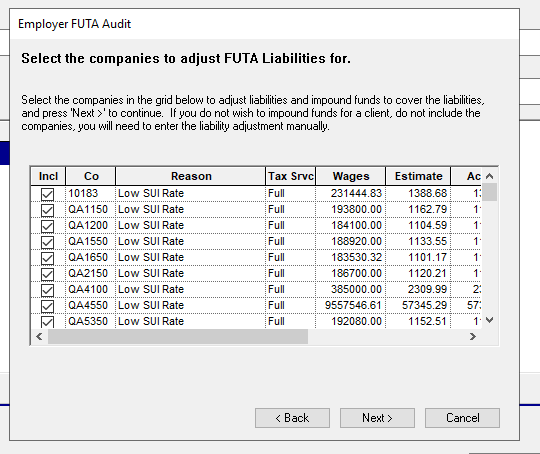
Fig. 8
If you want to include every company in the list, click the "Next" button.
To only select one or a few companies, uncheck individual "Incl" boxes for the companies you want to exclude.
You can highlight the Incl column as shown below, press the delete key on your keypad, and then select just the companies you want to include by checking the appropriate "Incl" boxes to the left of the companies.
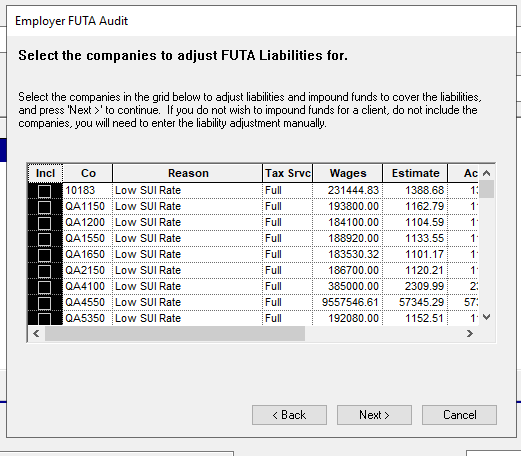
Fig. 8
Scroll to the right to see the tax dollar variance amounts.

Fig. 9
Click the "Next" button.
6. Configure Billing or Refund Settings
The next dialogue box refers to billing or refunding the client for the adjustment amount(s). The Impound Method and Date are based on the Company's Tax Transfer, located on Master Company Setup > Transfers tab > Tax entry.
For example, if you select "Five business days from Today (11/16/2022)" as shown in Fig. 10, and the Tax Transfer has a Method of ACH and Day of "Check – 1", a transaction will appear on the ACH Fix tab and the ACH tab located at System > Operations with an effective date of November 15, 2022, 4 business days from today. An example can be viewed in Fig. 11.

Fig. 10

Fig. 11
After the changes are committed as shown in Fig. 14, the ACH transaction creates with a Tr Cd of PPD. To change this to a CCD transaction, select the drop-down under Trans Cd, and select the desired transaction type. See Fig. 12.
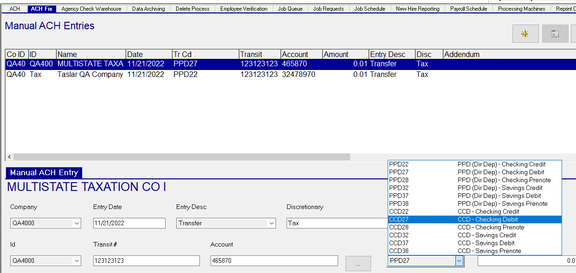
Fig. 12
Click the "Next" button if your settings are correct. Use the "Back" button if corrections are needed. Review the information again and click the "Next" button when your settings are correct.

Fig. 13
This is your last chance to cancel if you need to make corrections to your selections. Otherwise, click the "Next" button.

Fig. 14
7. Choose Client Letter Options
The next dialogue box gives you the option to create Client Letters. You have the following options for producing Client Letters:
- I do not want to inform them — No letters will be produced.
- I would like to email them — This feature is not available.
- Mail/Other — Provides the following 3 options:
- Print the letters to a printer.
- Export to PDF. A PDF file will be produced for each client and placed in the Documents folder of your ReadyPay shared folders.
- Export for Documents Portal. A PDF copy of the client letter will be placed in the Tax folder of the end client's Documents portal.
The client letter will contain the date you selected in Fig. 10. This date will only be correct when the end client's Tax transfer is set to impound on Check Date.
Review the information carefully.

Fig. 15
Complete the fields with the verbiage you want to use.
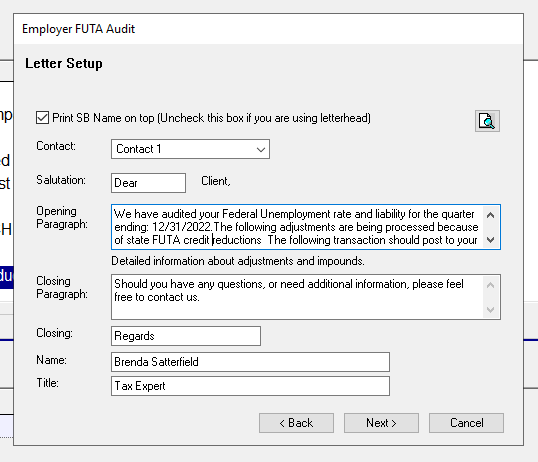
Fig. 16
Click the preview button at the top right of the dialogue box to review the letters. You can save the letters so that you can email them to the clients.
The next page shows a PDF of the client letter created above.
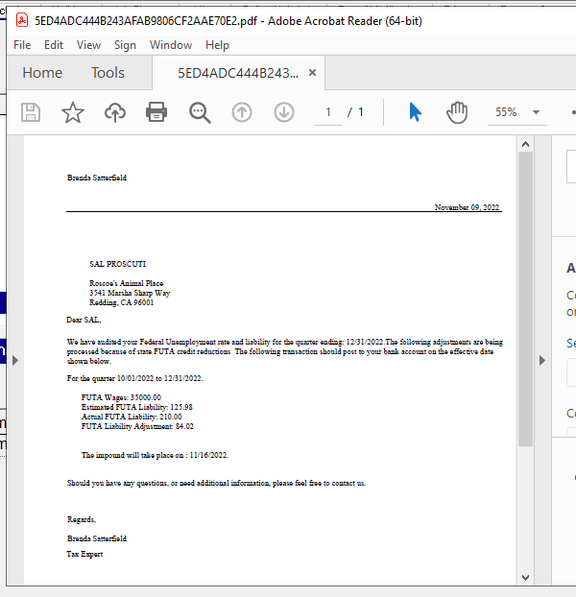
Fig. 17
8. Complete the Workflow
Click the "Next" button and review the dialogue box.

Fig. 18
If you selected to print the letters, the CRWPrint job will be active in the job queue to run immediately after you click the "OK" button.
Once you have processed the workflow, its entry will disappear from the Task List and from the Task Manager tab. You can always view completed tasks on the Task Manager tab by checking the "Show Completed Tasks" checkbox.
Questions?
Contact your Payroll Service Provider.