System Operations: Agency Check Warehouse
The Agency Check Warehouse is found under System > Operations.
If you distribute Agency Checks to the agencies on behalf of your clients, consider using the Agency Check Warehouse.
Instead of printing with the payroll, the Agency checks go to the warehouse where they can be printed in bulk for distribution. This eliminates manually pulling the Agency Checks from the payroll output and putting them aside for handling later. It is less prone to error than a manual process.
As payrolls process, any Agency Check marked to go to the warehouse is stored there until are printed.
Recommended Setup steps to take prior to using the Agency Check Warehouse
1a. Setup Billing for the production of each Agency Check. This produce is to bill for all Agency output, regardless if mailed, sent to the clien or submitted electronically via ACH.
To bill for the creation of each agency check, add a Billing Product in System > Controller > AR. Use the Drop List and select Products. Click the New (*) Button. Enter a code for the new Billing Product in the "Enter code for new Product" Dialogue Box.
Enter a description in the provided field.
On the Products Sub Tab, paste the following SQL into the box titled "Enter SQL for Billing Product".
SELECT COUNT (*) AS ItemCount
FROM CMiscCheckHist
WHERE CMiscCheckHist.calendarId = [paramCalendarId] AND
CMiscCheckHist.checkType = 'Agency'
1b. Setup a Billing Product for Postage using the steps noted above. Paste the following SQL into the "Enter SQL for Billing Product" box.
SELECT COUNT (*) AS ItemCount
FROM CMiscCheckHist
WHERE CMiscCheckHist.calendarId = [paramCalendarId] AND
CMiscCheckHist.checkType = 'Agency' and checknumber <> 0
1c. Add the product from Step 1a to each company having Agency Checks produced.
1d. Add the product from Step 1b to each company having their Agency Checks mailed.
Company Billing is managed on the Billing Tab under Master Company Setup
2. Update Packout Notes. Add instructions to the Packout Notes Sub Tab found in the Master Company Setup > SB Info tab

to mail Agency Checks to Agency. This is an indicator to the Production staff that the Agency Checks are going to the Agency Check Warehouse.
3. On the Company Setup > Agencies Tab, set ALL Agency Checks to go to the Warehouse. Do not have some print with the payroll and others go to the warehouse. This will cause issues with production.
Working with the Agency Check Warehouse
The Agency Check Warehouse looks and works like the ACH Warehouse.
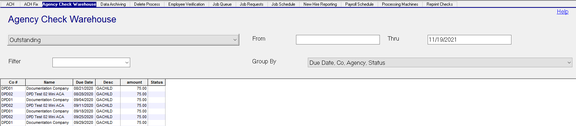
Outstanding : This is the default inclusion filter for the page. It displays any item that is "outstanding" as far as being processed. Use the Drop List on this field to view previously processed Agency Check activities.

Each time Agency Checks are printed, a new entry is added showing the date and time stamp of the activity.
Selecting a previous entry will display the Agency Checks processed on that date and time stamp.
From : Beginning date of the lookup. The Default is blank. This shows all outstanding Agency checks up to the Thru Date.
Thru : Ending date of the lookup. The Default is today plus two. Change the Thru date for activity past the next two days.
![]()
Filter : Use the Drop List for a list of Agency Check filters. Agency Check filters are found under the Agency Check Filters option in System > Setup > Misc. Create as many filters as needed to facilitate the printing of Agency Checks.
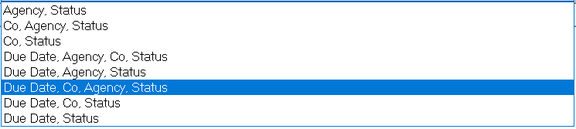
Group By : Use the Drop List to sort the Agency Checks.
Explanation of The Grid
![]()
The Grid provides detail on each Agency Check entry. The contents of the Grid are controlled by the From > Thru Dates and the selected Filter (if any). The order of display is controlled by the Group By setting.
| Field Name | Information |
|---|---|
| Co | The Company Code |
| Name | The Company Name |
| Due Date | The Check Date of the Payroll where the Agency Check was produced. |
| Desc | The Agency Code from the Agency Check setup |
amount: Net of the check
Status : Use the Status field to put the entry on Hold. Hold Entries are not included when the Agency Checks are printed.
To put an entry on hold, highlight the line. Once highlighted, mouse click anywhere on the line to display the "Toggle Hold Status" option. Select the "Toggle Hold Status" line.

The status of the line is now set to "Hold".
![]()
To remove the hold, repeat the same steps used to put it on hold
NOTE: As the Agency Check is a printed document, there are no details for to display.
This is why the "Toggle Detail Mode" option is greyed out.
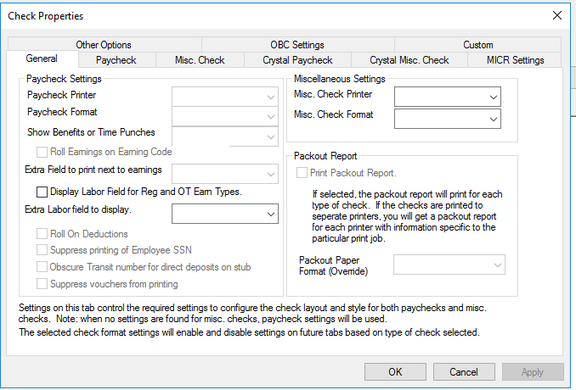
Check Properties : Click to display, and if needed, override the Agency Check printing configuration settings.
Printer : Use the Drop List to select the printer where the Agency Checks will print.
Print Checks : After ensuring all selection on the screen are valid, click to print the Agency Checks displayed in the grid.