Master Company Setup: Services
Services perform several functions within the software. Some grant access to specific modules in RPD and RPO. Others control how the payroll will process and what types of checks/reports are produced. Many offer varying service levels that control what the system does when performing tasks related to that service.
Most services are optional. Technically, you can process payroll for a company with only a Payroll Service in place. However, many others are generally needed to ensure all aspects of the payroll processing occur as expected (Check/voucher and report Printing, client billing. tax collection and payments, etc.).
There is an option to create informational Services. These informational services provide no functionality. They only allow for identifying clients associated with a function that is not part of the software. These can be created in the Misc Tab found in System > Setup. Find the services option in the Drop List.
For additional information regarding the available Services, their use and level(s) of service,
click here .
Setting up and maintaining Services
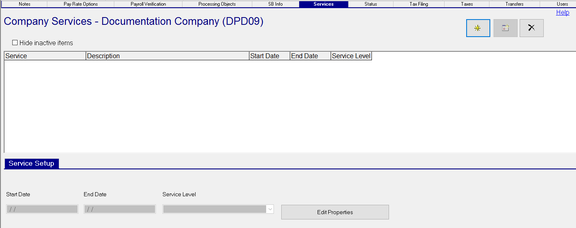
The Services Tab is divided in two parts. The upper section displays all the services setup for the client.
The lower section is used to update existing services.
Hide inactive items : Check to suppress services that are not in effect based on the current check date in Payroll.
Adding a new Service
Click the New (*) Button.
A box listing all available services (functional and informational) is displayed.
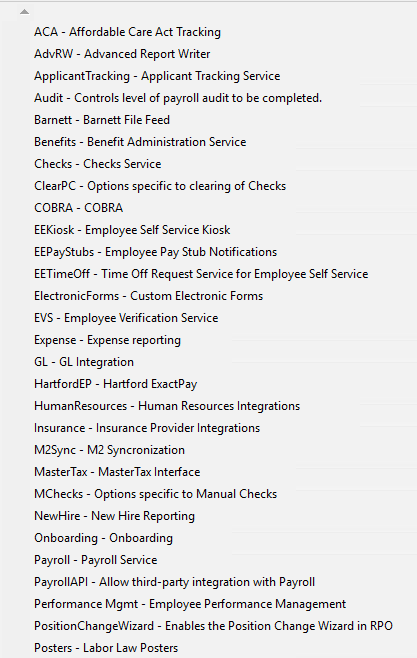
Select the desired service from the list.
You are moved to the Service Setup Sub tab.
Service Setup Sub Tab

| Field Name | Information |
|---|---|
| Start Date | The date the service is in effect. The check date in Payroll is loaded by default, Change as needed. |
| End Date | The date the service ends. The default date is 12/31/2100. Change as needed. |
| Service Level | Click the Drop List to see the available Service Levels. The options vary dependent on the service. |
| Edit Properties | Click this button to view any configurable options for the service. The options vary dependent on the service. A description is provided for each option. If a service has no configurable options, the button is inactive. |
Changing the Service Level of an existing service
Situations will arise where there is a need to change the Service Level of an existing service. In these cases, we will use the New Version button. It is located in the upper right corner of the tab, between the New and Delete buttons.

Highlight the service where the service level will be changed.
In our example, we will use the New Hire Service. The client will be moved from Mini to Full Level.
Click the New Version button.
The "New Effective Date" Dialogue Box is displayed.

The New Effective Date in the Dialogue box is set to one day after the end date of the service.
In this box, enter the effective date of the new version of the service. Our entry will be 10/01/2021.
Once entered, the top box to the right is updated with verbiage indicating the effective date of the new version. It also indicated the end date of the existing service will be changed to 09/30/2021 (one day before the start of the new version.
![]()
Hit the enter key to create the new version of the service.
The results are shown below.
![]()
To complete the change, select the version of the service with the forever end date.
Click on the Service Level Drop List and select Full from the available options.
Click the Edit Properties button. Update the Properties as appropriate to the service type.
![]()
If you select the older version of the New Hire Service, there will be a Yellow Exclamation Point field to the left of the New Button. This indicates there are versions of the service with effective dates later than those of the line you are viewing.