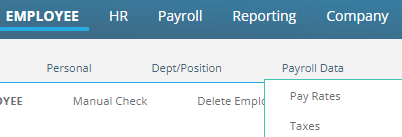
Employee: Payroll Data | Taxes
The Employee Taxes tab is found under the Payroll Data Section of the Employee module.
The Employee Taxes tab is used to manage which taxes, if any, an employee is subject to. This includes both employee and employer taxes. There are certain businesses, due to the nature of their business, that are exempt from various Federal, state and local taxes.
On certain employee taxes, options are provided that allow the employee to determine how the tax is withheld.
Other taxes, such as Medicare, Social Security and others, have predefined taxation rules and the employee is taxed according to those rules. The taxation of employer taxes is controlled exclusively by logic in the ReadyPay system.
A tax code cannot be added to an employee unless it first exists at the company level.
For information about the setup of Company Taxes,
click here.
Employee taxes are initially added to the employee when the individual is added to the system as a Tax Form W2 employee using the New Employee process. This is done in the Tax Information section of the New Hire screen.
For Onboarding clients, the process for adding a new employee and setting up their taxes is different than what is noted here. Once added, the information found in the "Working with Employee taxes" is applicable.
Please note: the following example is based on the test company used when building this document. The options in the Tax Information section will vary from copany to company based on their Company Level tax setup.
Selecting one of the other tax form options (1099M, 1099NEC, 1099R and OTHER) will not, by design, add employee level taxes during the New Hire process.

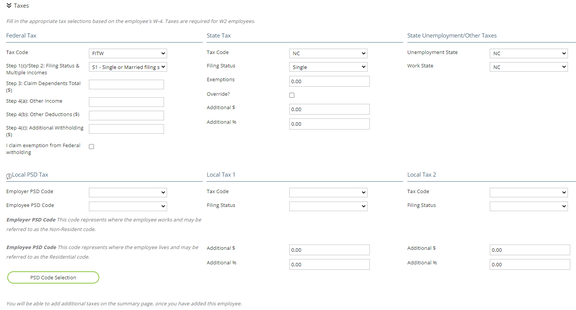
In the New Employee setup, tax withholding options are entered for FITW, SITW and Local tax codes, if any.
Tab Specific Buttons
Located at the top of the tab are Home City/State, Work State, Save Work State Add/Change State and Show All Taxes Buttons
![]()
Home City/State : Read only. Employee's current home city and state date from the Demographics tab.
Work State : Displays the employee's current Work State setting. Use the provided Drop List to change the Work State.
Save Work State : Click this button if the Work State was changed,
Add/Change State : Use the Change State Button to address the taxes of an employee moving from one state to another.
See the section below for an explanation of the Add/Change State function.
Show all taxes : This box is unchecked by default. Check to include any inactive tax codes in the display.
At the bottom of the tab are the Add Federal Tax, Add State Tax, Add State Unemployment buttons.

If the company is set up with Local Taxes, the Add Local Tax Button is available.
![]()
If PSD Tax Codes are set up on the company, the Add Local PSD Tax Button is available
![]()
Working with Employee Taxes
The following is an illustration the display of an employee's taxes in RPO. It can vary from employee to employee.
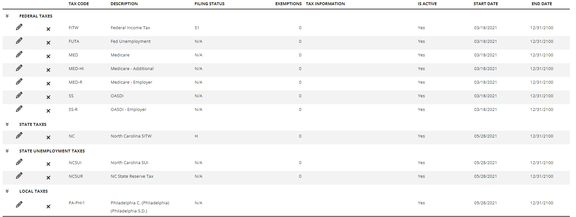
This section of the tab is divided into four categories: Federal Taxes, State Taxes, State Unemployment Taxes and Local Taxes. These categories only display if the employee has a tax or taxes in the category.
By Default, each section displays the active tax codes for the employee for those taxing authorities.
Use the "Show all taxes" check box to include inactive tax codes in the display.
Each section has a compress function next to the Section Name. Use this to hide the contents of the section.
![]()
Each Tax Code in the display has a Pencil Icon and a Delete Icon associated with it.
![]()
Use the Pencil to display the Tax Information Box. Use the X to delete the tax code.
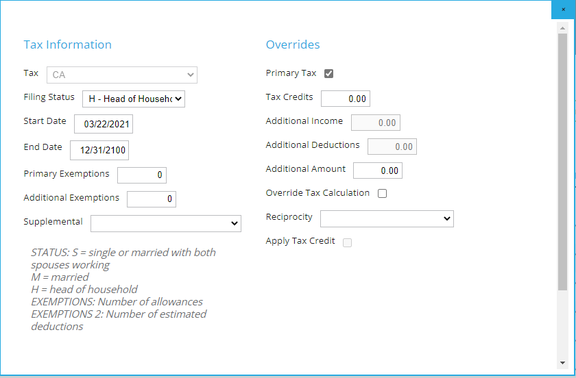
Tax Information Section
| Field Name | Information |
|---|---|
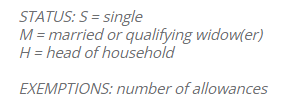
| Filing Status | Use the Drop List to select the appropriate filing status for this tax for the employee. The options in the Drop List are specific to the tax code being worker with. |
| Start Date | Effective Date for the tax code. |
| End Date | End date for the tax code. |
| Primary Exemptions | If applicable, enter the primary exemptions being claimed for this tax. |
| Additional Exemptions | If applicable, enter the additional exemptions being claimed for this tax. |
Dependent on the tax code, both the Primary and Additional exemptions fields are used, the Primary field is used and Additional is not used, or neither are used. These fields are no longer used with the FITW tax code.
Supplemental : Used when employee is paid with a Supplemental Check Type. Use the Drop List to select the appropriate option.

For more information on Supplemental Check Types,
click here.
Overrides Section
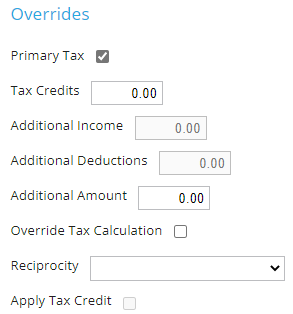
| Field Name | Information |
|---|---|
| Primary Tax | Indicates if the tax code is the Primary Yax Code in a Reciprocity scenario. |
| Tax Credits | Based on values from Step 3 of Form W-4. |
| Additional Income | Based on values from Box 4(a) of Form W-4 |
| Additional Deductions | Based on values from Box 4(b) from Form W-4. |
| Additional Amount | Adds this amount to the calculated tax. If Override Tax Calculation is checked, this amount is the amount withheld. |
| Override Tax Calculation | Checking this box forces an override of the tax calculation. This field can be used with the Additional Amount field to force the tax withheld to a specific amount. If this box is checked and no entry is made in the Additional Amount field, NO TAX IS WITHHELD. |
| Reciprocity | Use the Drop List to determine how the tax is calculated in a Reciprocity scenario. |

Apply Tax Credit : Not Used
Status Information Box : Displayed at the bottom left of the Tax Information box is information detailing the various Filing Status codes available with the tax code.
FITW Tax Code Specific Information
The Tax Information box for the FITW code is specific to the requirements for FITW.
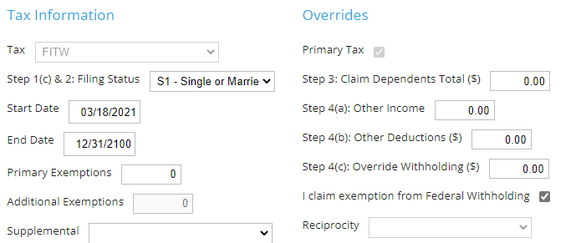
A number of the fields match the data the employee provides on Form W4.
For more information regarding the changes to the FITW tax calculation introduced in 2020,
click here.
Adding a new Tax Code to an employee
Based on the Tax Code to be added, select the appropriate Add Tax button using the options at the bottom of the screen.
![]()
The displayed buttons are based on the Company Level Tax Setup.
Click on the button for the type of tax you wish to add. (In our example, we selected Add State Tax).
The Tax Information Box is displayed.
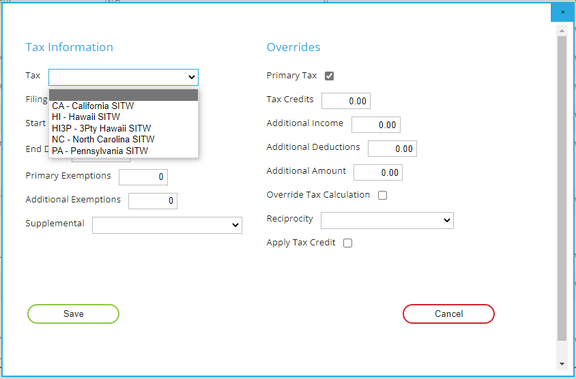
Select the tax code to add using the Drop List on the Tax Field. The Drop List will include any tax code associated with the particular Add Tax button you selected. We chose Add State Tax. The Drop List will contain all SITW codes on the company.
Populate the remaining fields in the Tax Information box as needed. Click Save at the bottom of the box.
The code is added to the State Taxes area.
If the new code is not displayed, it is not in effect for the current payroll dates. Select the "Show all taxes" Check Box to include in the display.
Editing an existing Tax Code
Click the Pencil Icon on the tax code you wish to edit.
The Tax Information Box is displayed.
Change the appropriate field(s).
Click Save
Deleting an existing tax code
Select the Delete ( X ) Button on the tax code you wish to delete.
The following information is displayed at the top of the screen.

Select OK to delete or the Cancel button to stop the deletion.
Using the Add/Change State Button
The following information is displayed at the top of the tab whenever working in Employee Taxes.
![]()
Click the Add/Change State button to initiate the Change State Wizard.
The Change State box will display. Use the provided Drop List to select the state where the employee is moving.
(The Drop List contains all active SITW code for the company).
For our example. our employee is moving from California to North Carolina.
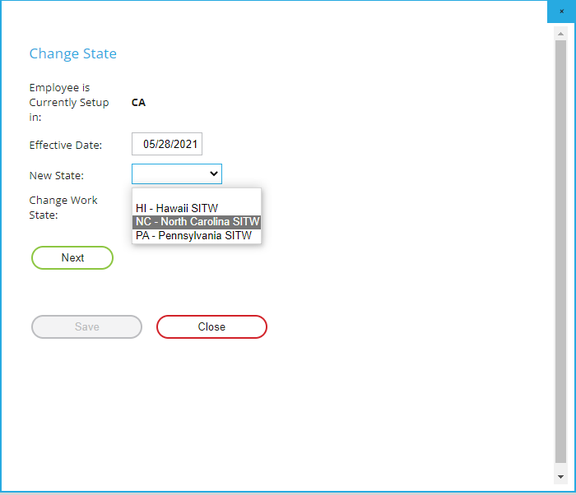
Set the Change Work State field as needed.
Click Next. The next step in the process is used to determine which tax codes from the old state no longer apply and which tax codes from the new state should apply.
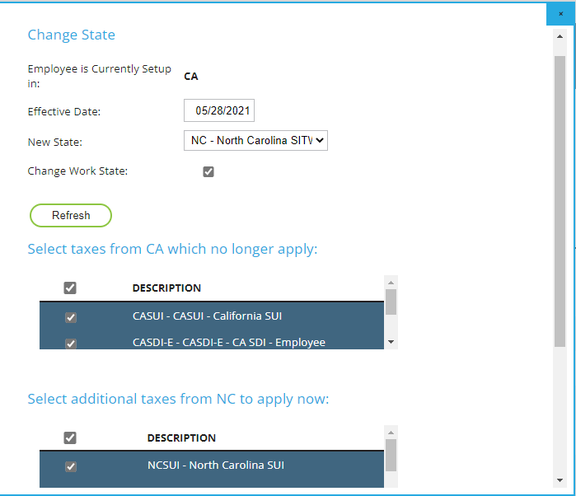
This step in the wizard addresses the employee UI codes.
While rare. you can uncheck any tax code needing to remain active on the employee.
Click the Save Button at the bottom.
The wizard also adds the SITW code for the new state. The filing status is set to the filing status of the old code.
In some cases, the filing status of the old state does not exist in the new state. In these cases, the first filing status in the list of filing statuses of the new state is used.
This completes the Change State Wizard function.