Company Setup: Departments
The Departments tab is used to define the structure on the company. On the tab itself, the description is Organization.
A company can have up to five (5) levels in its structure. Levels, also known as Cost Centers, define the organizational structure. Each company must have at least one Level. Common examples of structure are Departments, Branches with Departments and Divisions with Branches and Departments.
In order to take advantage of the built in sorting options available in a number of the on-board canned reports, it is important to assign the levels in their proper order. In the case of a structure with Branches and Departments, you would assign Branches to Level 1 and Departments to Level 2.
When you select the Departments Tab, you are taken to the Organization Levels Setup Sub Tab by default.
Organization Levels Setup Sub Tab
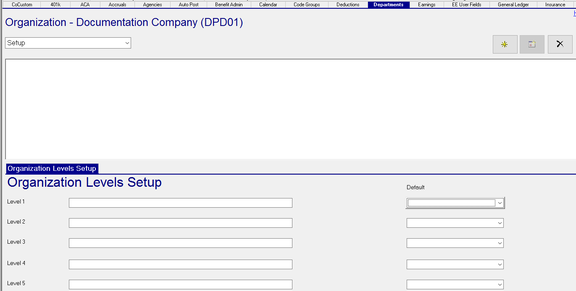
| Field Name | Information |
|---|---|
| Level 1 | Enter a Description for the Level. Each company must have at least one level. |
| Level 2 | Optional (unless there is a Level 2). Enter a Description for the Level. |
| Level 3 | Optional (unless there is a Level 3). Enter a Description for the Level. |
| Level 4 | Optional (unless there is a Level 4). Enter a Description for the Level. |
| Level 5 | Optional (unless there is a Level 5). Enter a Description for the Level. |
| Default | Optional. Use this to automatically assign a Default value for the level. Defaults cannot be assigned until the details of the level have been setup. |
Level 1 will be called Department for this article. Levels 2 through 5 will not be used.
To enter the data to complete Level 1, click on the Drop Arrow next to the word Setup.
Choose Level 1 from the Drop List. This takes you to the Department Setup Sub Tab.
Click the New(*) button. The "Enter new Department id" Dialogue Box is displayed. Enter a Department Number and click OK.

Note: If your level is called Dept, the dialogue box text will read "Enter new Dept id". The Dialogue box uses the description of the level. The Sub Tabs also use the name of the Level.
You are now moved to the Department Setup Sub Tab
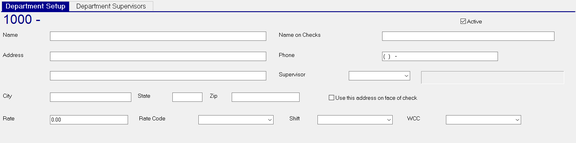
| Field Name | Information |
|---|---|
| Name | Name of the Department |
| Address | Optional. Address of the Department |
| Add'l Address | Optional. Additional Address information |
| City | Optional. City |
| State | Optional. State |
| Zip | Optional. Zip Code |
| Rate | Optional. Enter a Rate to be paid for all hours worked in this Department. |
| Rate Code | Optional. Enter a Rate Code to be used with hours worked in this department |
| Active | Default is checked (Active). Uncheck to deactivate the entry so it cannot be used in the future. You cannot deactivate a Department until all employees for that department have been reassigned to other departments. |
| Name on Checks | Optional. Use this name on the checks for employees in this department |
| Phone | Optional. Phone Number for this Department |
| Supervisor | Optional. Assign a Supervisor from the Drop List of this field. This will update the CC Level Supervisor field on the Dept/Position Tab of any employee assigned to that Department. |
The entries in the Drop List are based on the Supervisors setup using the instructions in the Solutions article called Supervisors: Setup and Use in RPO. To view that article, click here.
| Field Name | Information |
|---|---|
| Use this address on face of check | Optional. The address for this Department will be used instead of the name on the Bank Account from where checks for this Department are drawn. |
| Shift | Optional. if applicable, select a Shift from the Drop List. All payroll entries for this Department will be assigned to the selected Shift. The list of Shifts is housed in the Company Setup > Misc Tab. |
| WCC | Optional. If applicable. select a Workers Comp Code from the Drop List. All payroll entries for this Department will be assigned to the selected WCC value. Workers Comp Codes are housed in the Company Setup > Work Comp Tab. |
Department Supervisors Sub Tab
Use this Sub Tab to assign a Supervisor to this Department. This will allow the Supervisor access to their employees on the ESS Kiosk.
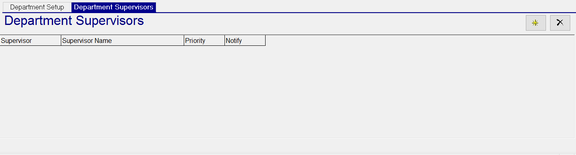
To add a Supervisor to the Department, click the New (*) button.
The "Select your Supervisor" Dialogue Box will be displayed. Use the Drop List to assign the appropriate Supervisor.

The entries in the Drop List are based on the Supervisors setup using the instructions in the Solutions article called Supervisors: Setup and Uses. To view that article, click here.
Multiple Level Company Structure
Sample Setup of a company with Dept within Branches
Setup (Organization Levels) Sub Tab
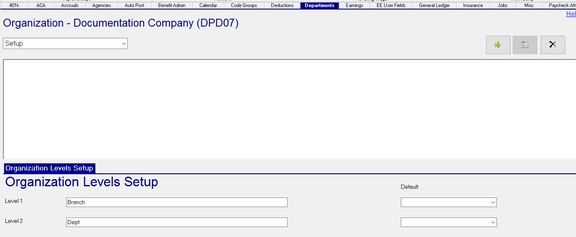

Level 1 (Branch) Setup

Level2 (Dept) Setup
